

Sign-up for Skypoint or login
Visit https://app.skypointcloud.com/signup to sign up and try Skypoint platform.
If you already have a subscription, login at https://app.skypointcloud.com

Enable APIs on your Skypoint instance
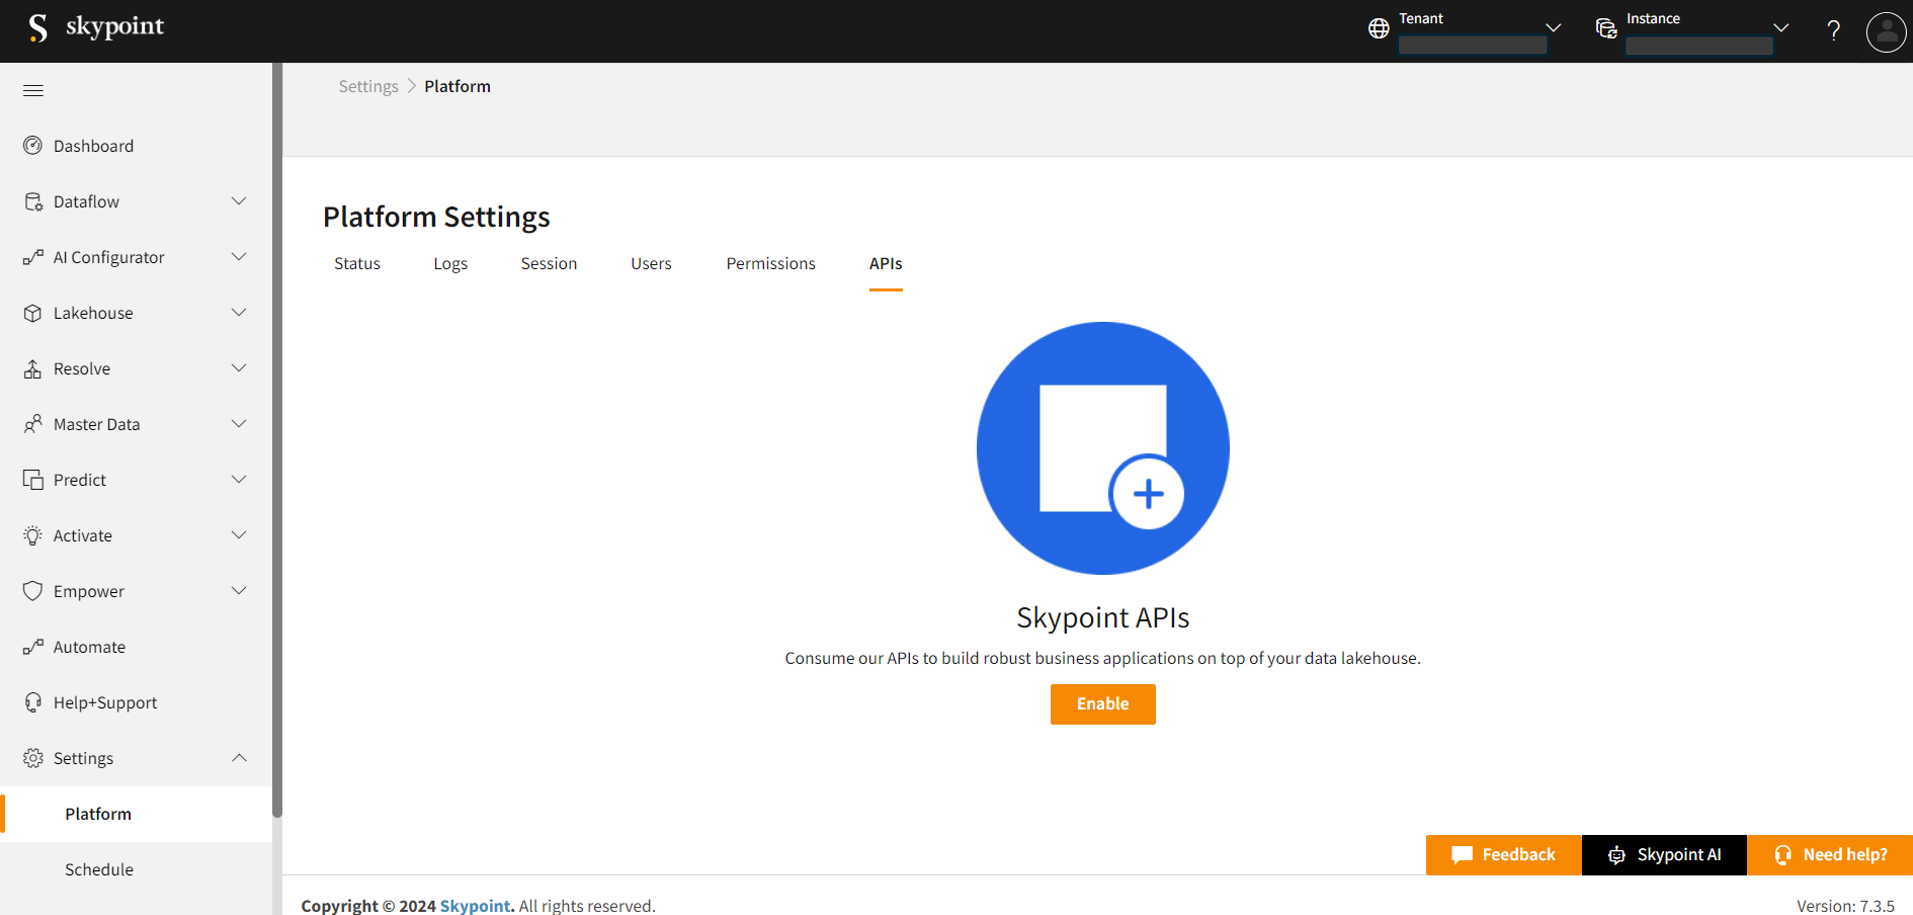
Go to https://app.skypointcloud.com
Navigate to the Platform page under the Settings menu
Switch to the APIs tab and click the Enable button.
This will assign your environment a Primary and Secondary subscription key that must be used in the API requests. You may also regenerate the keys by pressing the Regenerate primary or Regenerate secondary buttons at the top of the page.

Setup Service Account
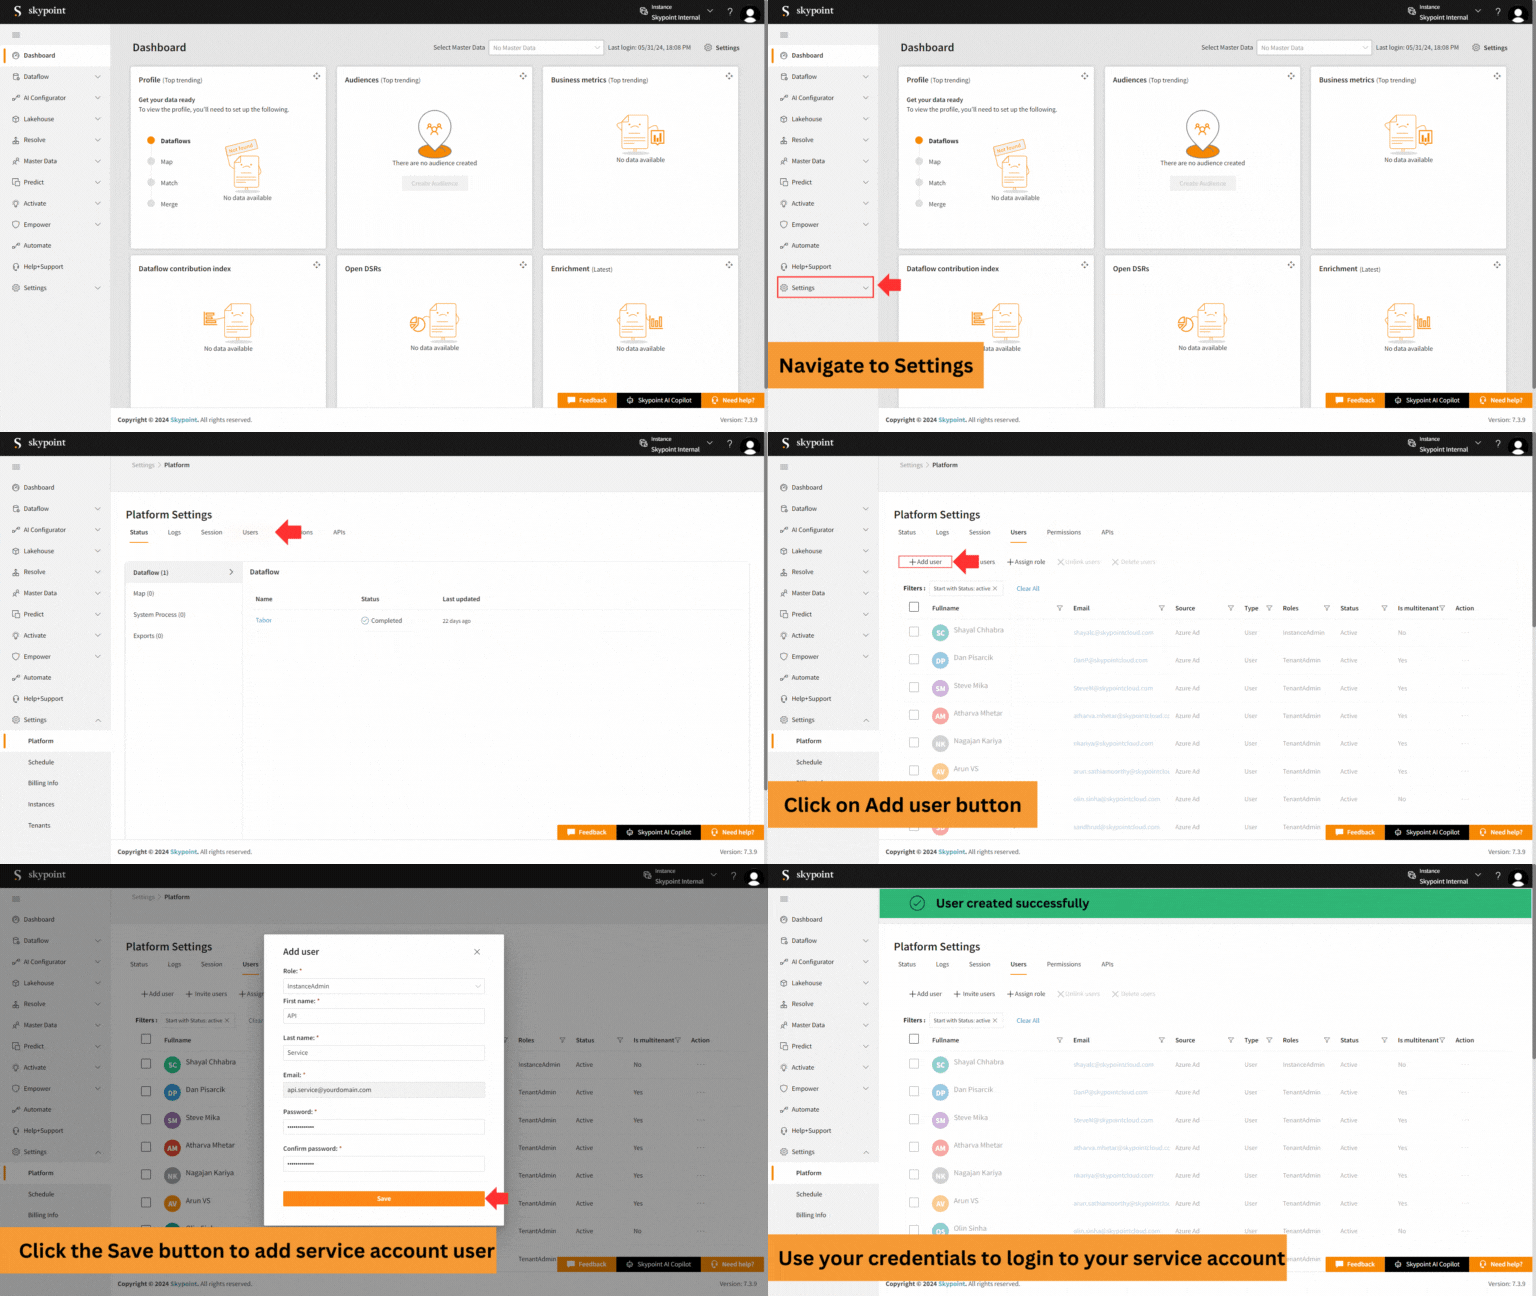
Navigate to Platform under Settings from Skypoint AI Studio.
Choose Users tab and click on Add user button.
Follow the instructions below to complete the form fields:
Role: Select an appropriate role from the dropdown to grant permissions for the service account. First Name: Enter a name that identifies the service account. Last Name: Enter a name that further describes the purpose of the account. Email: Enter the email address associated with the service account. Password: Enter a secure password that meets the complexity criteria (e.g., length, special characters, numbers, etc.), and store it securely. Confirm Password: Re-enter the password to confirm. Save: Click Save to submit the form.
Example: Role: Select the role designated for service accounts. First Name: API Last Name: Service Email: api.service@yourdomain.com Password: [YourSecurePassword] Confirm Password: [YourSecurePassword]
Get confirmation message User created successfully upon submission.
You can use the login credentials (email and password) to get access token endpoint.

Explore and try out our APIs
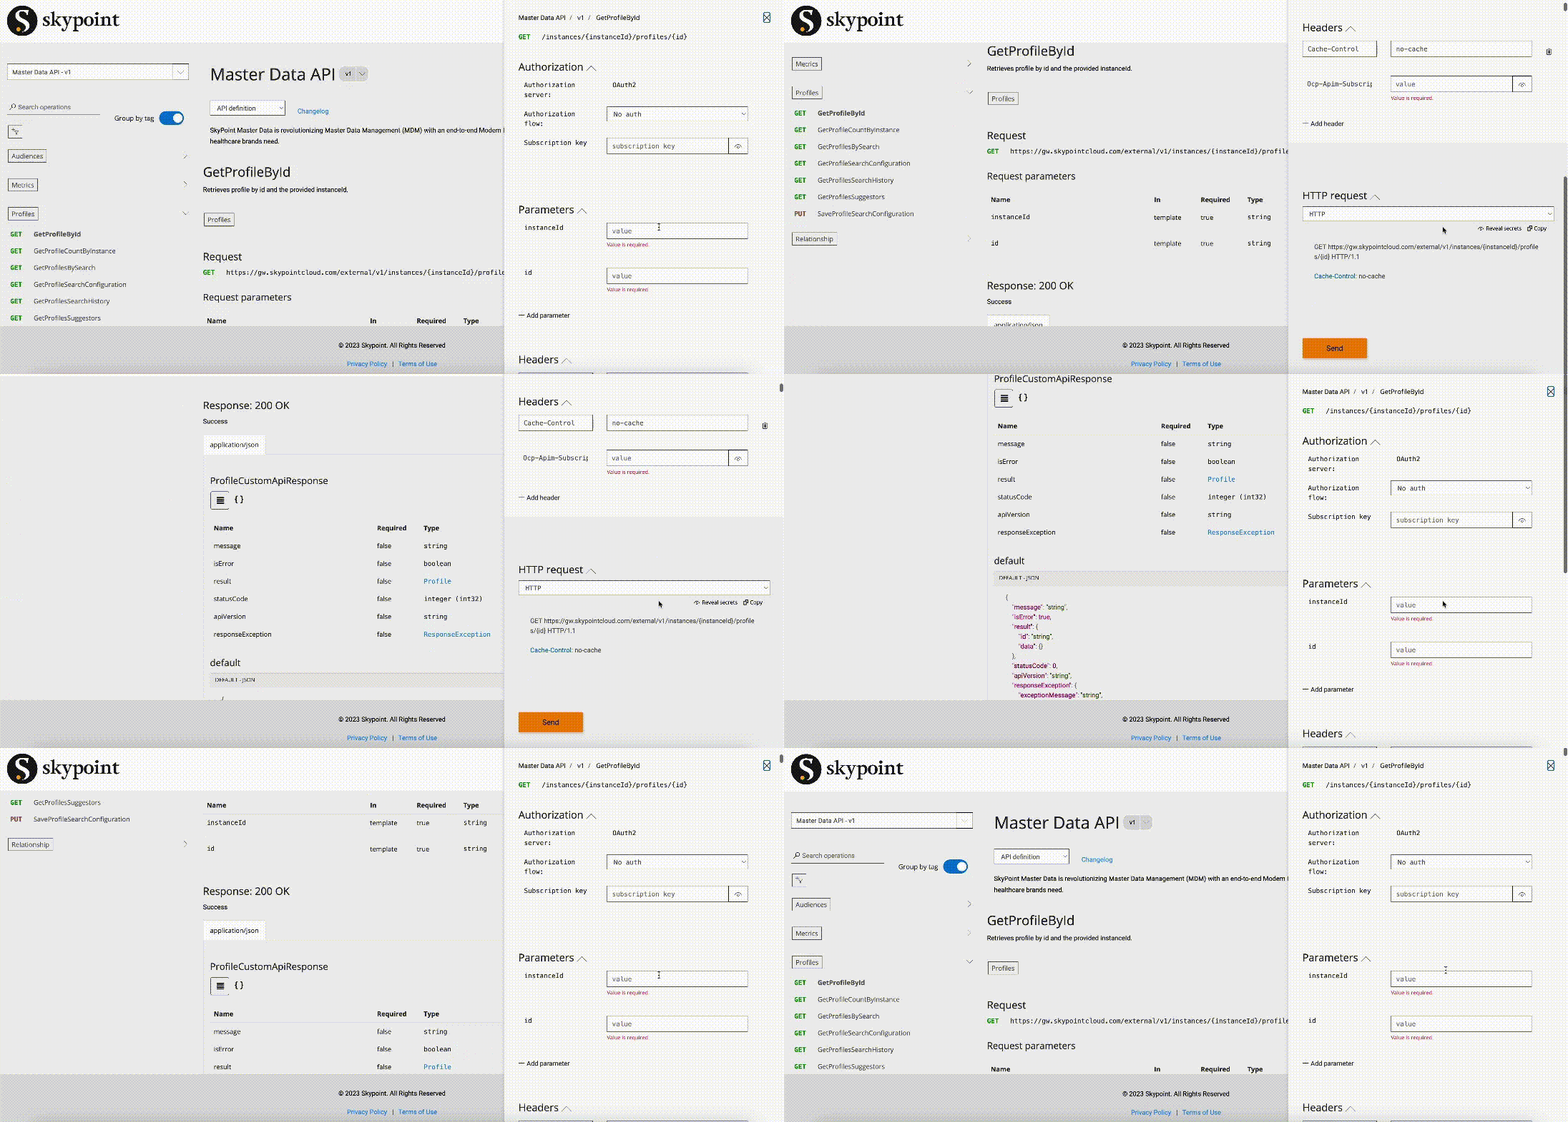
Under the APIs tab on the Permissions page, click the Explore our APIs link
Select an API operation to try and click the Try It button
In the side panel that opens, select the drop-down labeled Authorization and choose implicit. This should automatically fill the Authorizationheader with a bearer token. Your subscription key will be automatically populated
Fill any necessary query parameters, scroll to the bottom of the panel, and click the Send button
The HTTP response will soon appear below
Next steps
With your API subscription key ready, you can now proceed to creating an App Registration in Azure.